My basic inspiration came from here, but I did change a few things due to my tiles being stamped and just for my own preference.

Supplies:

- Four Ceramic Tiles: Bought these at Home Depot $25.00 for box of 80, I had a gift card so none of this came out of pocket. These particular tiles are 4.24 x 4.25 they also sell them individually for under $0.30.
- Mod podge
- Foam brush
- Cardstock: I am sure you can use regular construction paper, news paper anything you like, but I wanted cardstock because it was thicker, and less bubbles. I bought four sheets for $0.29 each, but I still have enough to make another set, or use for some other small project.
- Felt: I changed it to an all felt bottom instead of felt circles because I didn't like how the bottom of the tile looked. The felt was $0.25 per sheet, and I used one sheet to make all four coasters.
- Lacquer: this cost me like $4.00 but I can use it on a lot of other projects, the can is still really full.
Total Cost: about $5.50 for four coasters!
Step 1:
You want to cut your paper down to size. I had to cut my paper to 4.25 x 4.25 because of the stamps on the tile. If you would like a nice edging around the paper simply cut the paper down to 3.75 x 3.75. It gives you a pretty edge of what ever color your tile is. This is where those handy paper cutters really come into play.
Step 2:
Apply a thin coat of mod podge to the tile using your foam brush.

Then place the paper where you want it, the plus to card stock is that it is thicker so you can slide it around till you get it where you want it. Let the paper sit until it is dry, I just continued with other tiles while letting the ones before dry.
Step 3:
Apply mod podge to the top of the paper, this is really important if you cut the paper smaller than the tile, it will prevent the edges of the paper from peeling up.

I allowed the first coat to dry then gave each tile a second coat. The thinner each coat the faster they will dry.
Step 4:
Spray each tile with a good coat of the Lacquer, make sure you are in a well ventilated area!

I gave each tile two coats of Lacquer, letting them dry in between. The lacquer allows the paper to stay dry when glasses of liquid have condensation dripping down.
Step 5:
Coat the back of each tile with mod podge (only if you are attaching a full sheet of felt)

I don't like the way that the tiles look on the back, so I used a full sheet of felt to cover the back!

You can buy the little circles of felt at most craft stores, or in craft sections, some are even self adhesive. You are using the felt to prevent the tiles from scratching your tables. Just go with whatever you think would look better!
Finished Product!
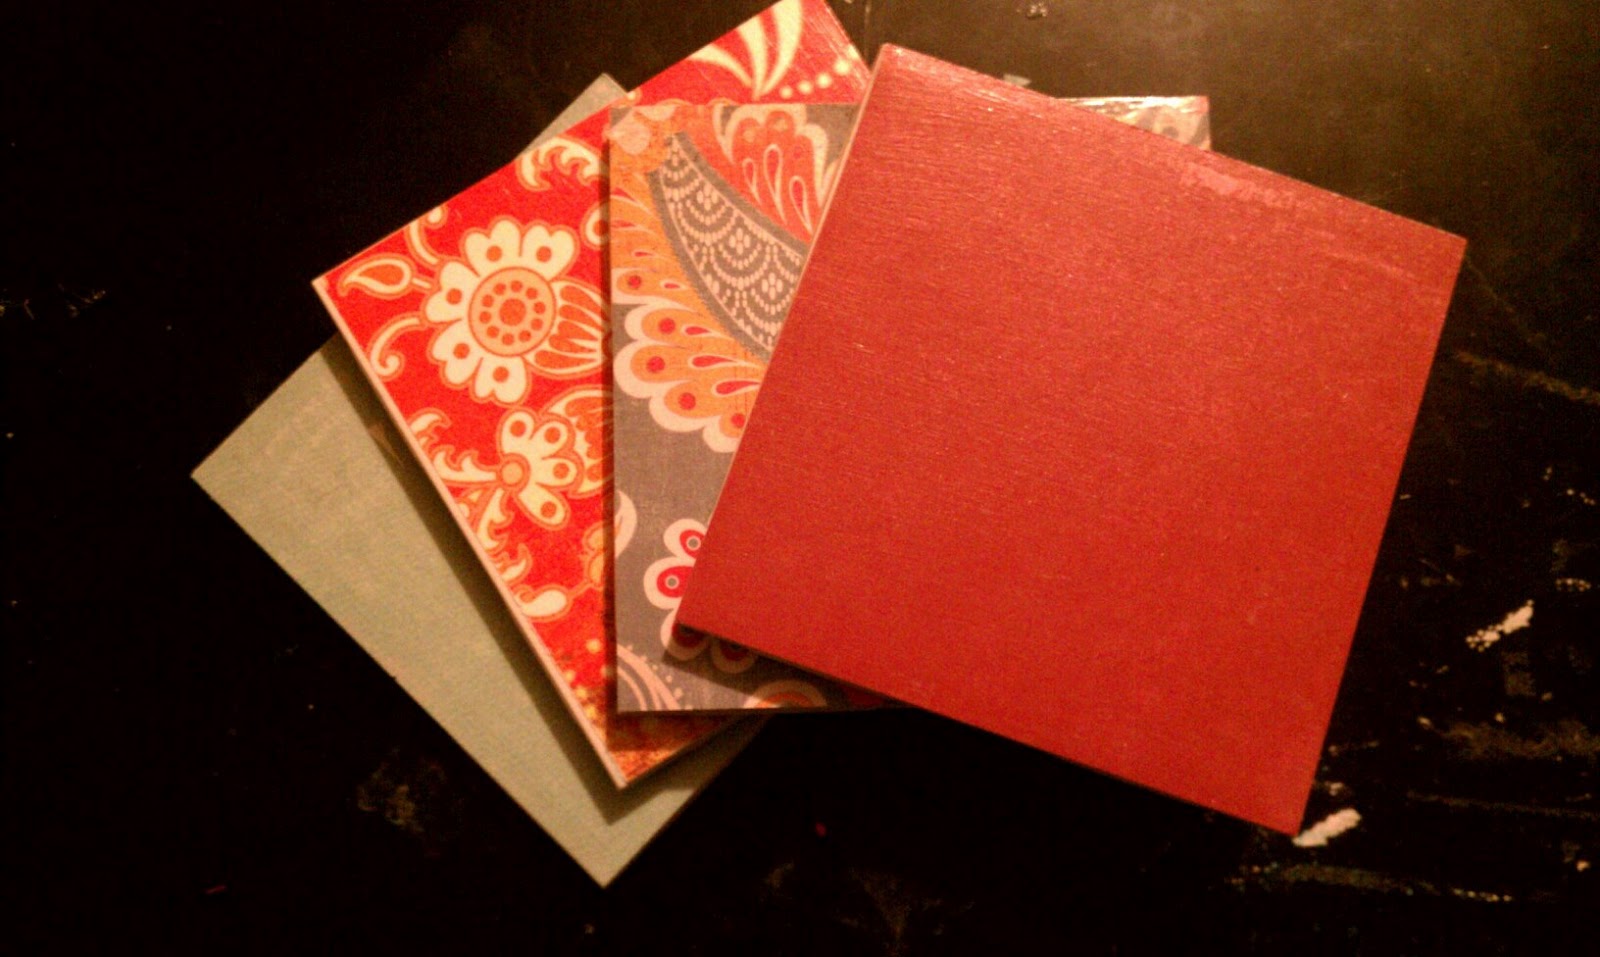
We like to use Fall colors in our decorating. I love fall, I am originally from Oklahoma and there isn't a season called fall there! :) I love the colors and Jerm says they are relaxing and not girly. After thinking about these coasters I realized that with an almost two year old who uses our living room as a play room that these may become weapons for her. I think that for now I am going to place them on the Dining Room table and use them as bases for pillar candles ( the electronic smell good kind) At least until I can trust her not to ninja star them at my head!
Not that this sweet baby would ever do something like that right....

P.S I linked this post up with Make It Yourself Monday so head on over there and check out some other cute ideas!

Really love these Alishia! We desperately need coasters for our home and I cannot find ones that I'd like to have sitting out all the time. This is definitely a project I'll be trying!
ReplyDeleteThank you! The really great thing about them is they are so cheap to make. Once you have made one set you have most of the material to make many more for even cheaper. You could make seasonal ones and change them up all the time! (I am thinking about making sets for my favorite Holidays)
Delete